

Aug 1, 2022
Customising Content of Your Email Alerts (Pulse 6+ versions)
Pulse now enables you to customise the email that is generated based on alert criteria. This is useful if you want to integrate the Pulse alerts into an existing help desk/ticketing system that accepts email as a ticket input source.
Customising the Subject Line
A custom prefix can be added to the subject line for alerts. To do this you need to:
Open the Pulse.cfg file located by default at C:\Program Files\Pulse for TM1\conf\Pulse.cfg
Find the setting SubjectPrefix, the default value is [Alert].
Change this value to whatever you like.
Save the file.
Restart the two Pulse services.
Customising the Body of the Email
The body of the email can also be customised, here you have the ability to fully customise the email to your needs. Pulse uses a templating system called HandleBars to render the email content. It uses html like tags to create logic, if/else and loops, and {{variableName}} syntax for displaying content.
The template directory is located by default in the webapps\ROOT\WEB-INF\alert-templates folder in the Pulse installation directory. The default location is: C:\Program Files\Pulse for TM1\webapps\ROOT\WEB-INF\alert-templates.
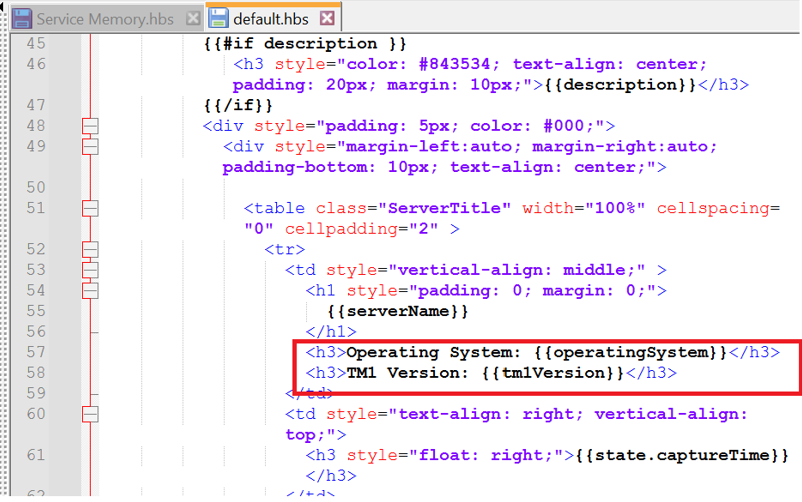
The default template that is shipped with Pulse and is used for all alerts is called Default.hbs. You should use this as a basis for your custom alerts, don’t edit this file directly as it will be overwritten each time Pulse starts.
When an alert is generated, Pulse searches the template directory for a template using the following hierarchy:
1. Templates are named based on the Alert Type, the possible values are:
o Service is Offline.hbs (Offline alert),
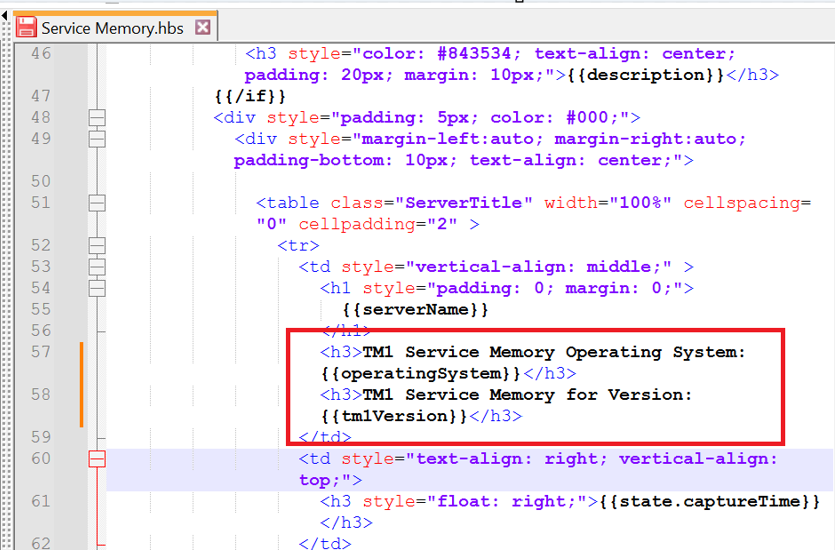
o Service Memory.hbs (Memory alert),
o CPU.hbs
o Threads.hbs (Concurrent Users),
o Error Log.hbs
o Server Disk Free.hbs (Disk Free alert),
o Run Time.hbs
o Threads Waiting.hbs (Waiting alert),
o Wait Time.hbs
o Rollback Event.hbs
o Cancel Thread.hbs
o Server Log.hbs
If Pulse cannot find one of the templates above it will look for a file called Custom.hbs.
If the Custom.hbs file cannot be found Pulse will revert to the default template, Default.hbs.
Creating a New Template
Instead of creating a template from scratch you should first copy the Default.hbs template naming it either Custom.hbs or the name of the particular alert you want to customise.
You can use any text editor to customise the file but we recommend using Notepad++ as it is very easy to use. You can also colour the html syntax by selecting HTML from the Notepad++ Language menu.
The HTML syntax for most email clients is a cut down version or what is available in the browser so try to limit the use of css styles and instead use inline styles (i.e. style=”text-align:left;”).
The syntax for the template is described on the HandleBars website, you should familiarise yourself with this syntax before attempting to change the template. To edit the template:
Open the template in Notepad++ (or your favourite text editor).
Edit the template.
Save the file.
Test using an existing alert (see below).
Check the server.log file for any errors (located by default at C:\Program Files\Pulse for TM1\logs\Pulse.log).
Testing
To test the alert template you are going to have to create an alert that gets generated frequently. The easiest way to do this is to create a memory alert with a low threshold (5%) and set the Repeat Interval to 1 minute.
Server State Object
The state object contains most of the information that you will want to display in the email. The best way to pick up what to display is by looking at the existing Default.hbs template. A full description of the content of the object is below:
ServerState is the root object.
ServiceStates is a list of ServiceState objects.
TM1Top contains TM1TopState.
Items contains a list of TM1TopItem objects.
ServerState
ServiceState
TM1TopState
TM1TopItem


